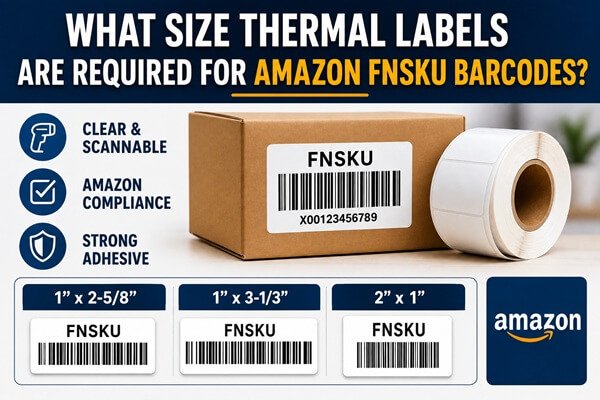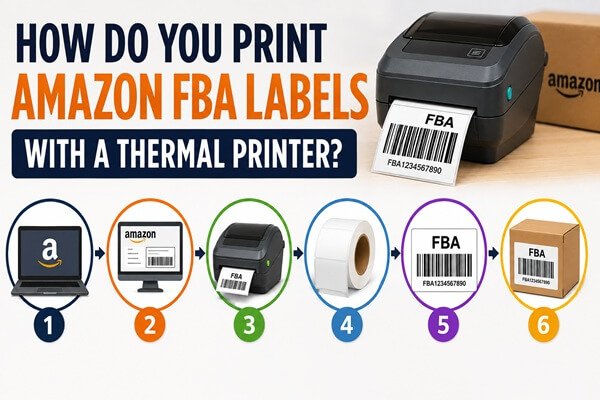
Printing Amazon FBA labels with a thermal printer requires two separate workflows: product labels identify each sellable unit, while shipment labels identify the cartons sent to a fulfillment center. Download the correct file from Seller Central, match the file to the physical label size, print at 100% scale, and scan a sample before labeling the full batch.
Do not assume that a clear-looking label is acceptable. A barcode can appear sharp to the eye and still fail because it was resized, clipped, placed over an edge, printed with insufficient contrast, or attached to a surface that wrinkles. Confirm Amazon’s current requirements in your account because available label formats and preparation rules can change by product, program, and destination.
Which FBA Labels Are You Printing?
An FNSKU or other Amazon product barcode is attached to the individual sellable unit. It tells the fulfillment center which seller and listing the item belongs to. A carton or shipment label belongs on the outer shipping box. Pallet shipments and certain programs may require additional labels.
Keep these files in separate folders and name them by shipment or SKU. Printing a carton label onto a small product label, or applying an FNSKU to the shipping carton, creates avoidable receiving problems. Review the shipment workflow before printing so every label has a defined package and position.
What Printer and Labels Should You Use?
A direct thermal printer is practical for short-life FBA product and shipping labels because it prints without ink or toner. Choose a model that supports the required width and resolution. A four-inch printer handles common shipping labels, while small product labels may benefit from a 300 dpi printer when the barcode and text are dense.
Match the printer’s core size, maximum roll diameter, sensing method, and media path. Use smooth, white, non-reflective thermal labels that produce dark bars and clean edges. Product packaging, storage time, heat, moisture, and handling determine whether standard direct thermal paper is sufficient or a more durable construction is needed.
How Do You Download the Correct Label File?
Create or open the relevant shipment in Seller Central and use the label option provided for that workflow. For product labels, confirm the SKU, product name, condition, and quantity before downloading. For shipment labels, confirm the carton count and make sure each file remains associated with the correct box.
Open the downloaded PDF before printing. Count the labels and compare the visible identifiers with the shipment plan. If the PDF is designed as a sheet of multiple labels, do not send it directly to a single-label thermal printer without using a supported thermal format or correctly separating the pages.
Which Print Settings Prevent Resizing?
Set the printer page size to the exact label dimensions. In the PDF print dialog, use Actual Size, 100%, or no scaling. Disable Fit, Shrink Oversized Pages, borderless expansion, and automatic rotation when they alter the barcode. Set orientation from the preview rather than guessing.
Use the printer’s normal direct thermal mode and begin with the media manufacturer’s recommended speed and darkness. Excessive darkness can widen barcode bars; insufficient heat produces gray or broken bars. If the output is shifted, correct the page size, margins, sensor calibration, or driver settings instead of dragging the artwork inside an editor.
How Should You Test the First Label?
Print one label and compare its physical size with the intended format. Check that no barcode bars, text, or quiet zones are cut off. Scan the barcode using the device or application used in your process, then confirm that the decoded value matches the FNSKU or shipment identifier.
Rub the print lightly and inspect it under normal warehouse lighting. The image should not smear, skip, or show vertical white lines. If several printers are used, approve a sample from each one. A saved setting on one workstation does not prove that another driver or browser is configured correctly.
Where Should Product Labels Be Applied?
Place the product label on a smooth, flat, accessible surface. Keep the barcode away from corners, seams, curves, openings, and areas that will be folded. Cover other scannable product barcodes when the FBA workflow requires the Amazon barcode to be the only barcode used for identification.
Apply the label with firm, even pressure. Do not bridge it across a poly bag seam or allow clear tape, stretch film, or reflective laminate to distort the scan path. On small or curved products, consider placing the item in suitable packaging that provides enough flat area for the required label.
How Should Carton Labels Be Applied?
Match every carton label to the box it was generated for. Place it on a flat exterior panel where it remains visible during receiving. Avoid the box seam, closure tape, corners, and edges. Do not place the label where opening the carton will cut through the barcode.
If two labels are required for a shipping service or FBA workflow, preserve both and follow the displayed placement instructions. Remove or fully cover obsolete shipping barcodes from reused cartons. Multiple visible tracking codes can cause automated sortation or receiving equipment to read the wrong symbol.
What Causes FBA Barcode Failures?
- Printing a sheet-formatted PDF onto one label without separating or reformatting it correctly.
- Allowing the browser or PDF viewer to fit the page and reduce the barcode.
- Using low-contrast media, a dirty printhead, excessive speed, or incorrect darkness.
- Covering only part of an old barcode or placing the new barcode over a curve.
- Mixing labels from different SKUs, cartons, shipments, or seller accounts.
Fix the workflow before reprinting the whole batch. Recalibrate the printer, clean the printhead according to its instructions, reload the correct media, and print a small controlled sample. Record the approved size, driver, scale, speed, and darkness for future operators.
What Should You Verify Before Shipping?
Count labeled units against the shipment plan, spot-check every SKU, and scan samples from the beginning, middle, and end of the print run. Confirm that carton labels match their assigned cartons and that old barcodes are not visible. Keep labels dry and protect printed rolls from heat and sunlight.
For repeat production, give your label supplier the printer model, label dimensions, roll direction, core, adhesive requirement, expected storage conditions, and monthly volume. Recheck current Seller Central instructions before each new program or packaging change. The reliable process is simple: correct file, exact size, 100% scale, verified scan, correct placement, and a final count before dispatch.